
Have you ever struggled with flat or smoky flavors in your cocoa? You’re not alone. The choices you make right after harvest determine up to 80% of your final bean quality. This guide provides clear steps, practical tools, and real-world examples to help you perfect the initial processing of your cocoa beans.
hy Initial Processing Defines Your Flavor
The journey from pod to premium bean starts the moment you harvest. During these first few days, a series of natural processes unlock the flavor potential within your cocoa. First, yeasts convert the pulp’s sugars into ethanol. Then, bacteria transform this ethanol into acetic acid, which generates heat.
This heat and acidity are crucial. They stop the bean from germinating and trigger enzymes that change its internal chemistry. The bean’s color shifts from purple to brown, bitterness decreases, and the precursors for those rich chocolate notes are formed. Proper drying then locks in this flavor profile and prevents mold. Each step is a small but vital part of a chain that decides whether you produce a batch with fruity, floral notes or one that tastes like rubber and smoke.
A Step-by-Step Framework for Quality Cocoa
Follow this practical framework to ensure consistency and quality in every batch.
Step 1: Harvest Only Ripe Pods

Your flavor journey begins with sugar. Ripe pods contain the maximum amount of sugar needed to fuel a strong fermentation and develop complex flavors. Harvesting unripe pods leads to weak fermentation, high acidity, and a final product that tastes astringent.
- How to Check for Ripeness: Look for a color change (e.g., green to yellow, red to orange). The stem connecting the pod to the tree will start to yellow. A ripe pod makes a dull thud when tapped, not a sharp sound.
Step 2: Rest Pods for 0-2 Days (Optional)
A short rest period in the shade, known as “pod storage,” can help the pulp loosen and prepare for fermentation. This encourages a more uniform process. However, in warm and humid climates, do not exceed two days to avoid mold and germination.
- Best Practices: Keep pods off the ground in a shaded, well-ventilated area. Never stack them on bare soil or in standing water. If disease pressure is high on your farm, it’s best to skip this step.
Step 3: Break Pods Hygienically

Cleanliness is non-negotiable. Contaminants from soil, husk fragments, or dirty tools can introduce off-odors and undesirable molds, ruining your fermentation.
- Good Practice: Use clean tarps and food-safe tools like wooden mallets. Keep shell fragments out of the bean mass. Importantly, do not wash the beans before fermentation—this would rinse away the essential sugars that microbes need to generate heat.
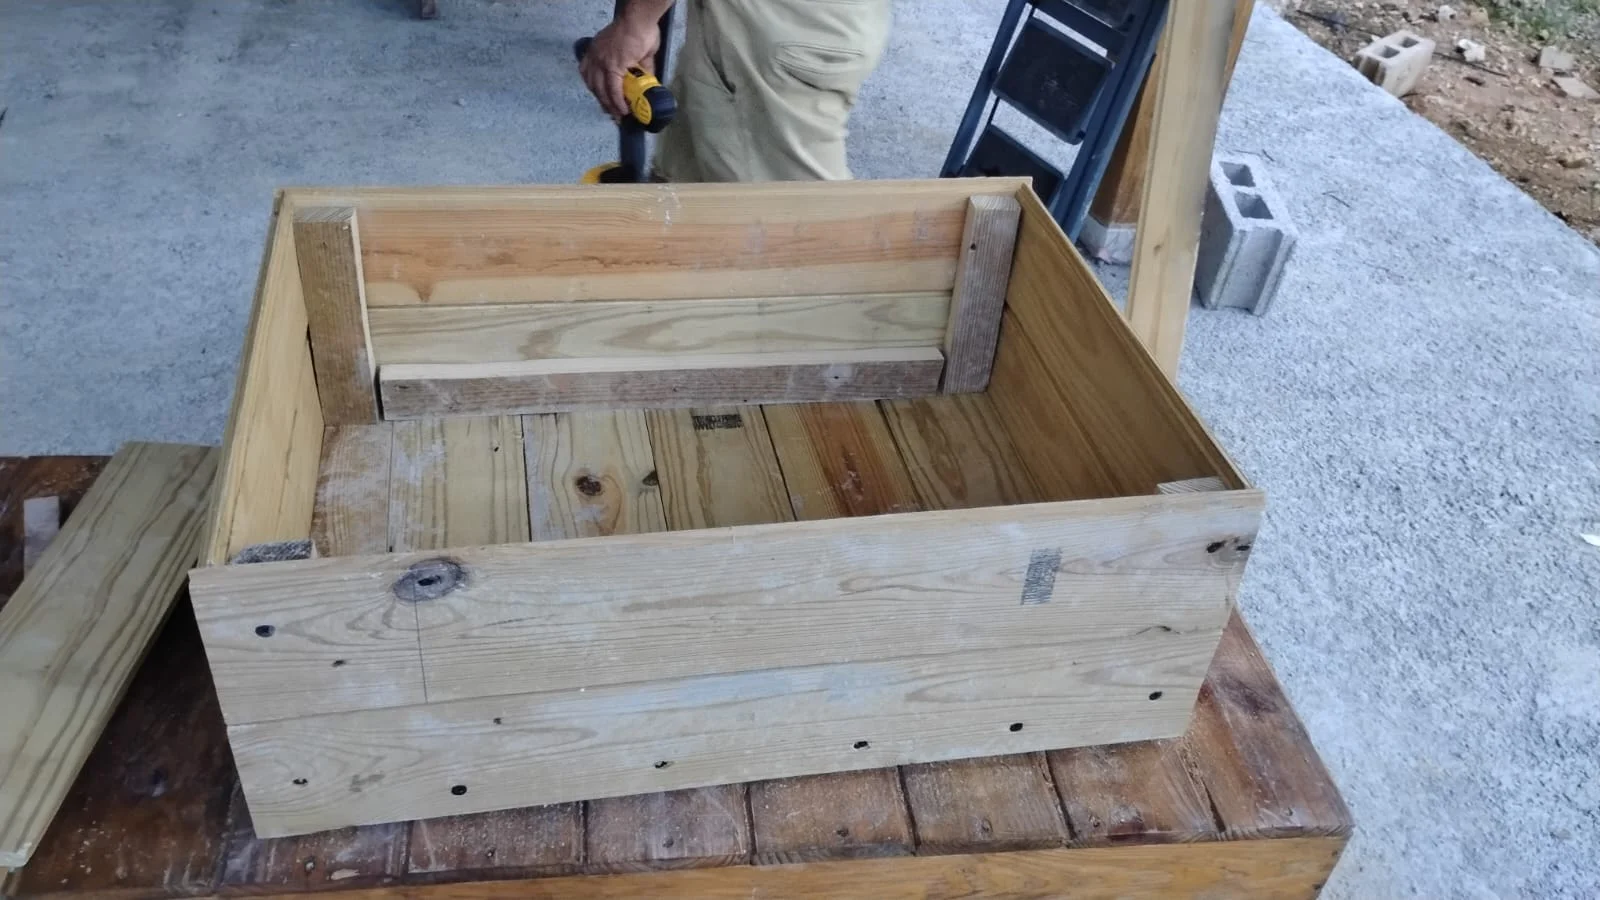
Step 4: Ferment in a Proper Box or Heap

To generate and retain enough heat, your beans need to be fermented in a sufficiently large mass. A shallow pile will lose heat too quickly, stalling the process and resulting in a raw, underdeveloped flavor.
- Key Parameters: Aim for a minimum depth of 50 cm. Use a wooden box or a well-formed heap. Ensure there are small holes or slits for drainage, and cover the beans with banana leaves or jute sacks to hold in the heat.
Step 5: Turn the Beans on a Schedule
Turning the bean mass is critical for two reasons: it introduces oxygen that acetic acid bacteria need to work, and it moves the cooler beans from the edges into the hot center. This ensures an even fermentation.
- Suggested Schedules:
- Forastero: 5–6 days total, with turns at 48 and 96 hours.
- Trinitario: 4–5 days total, with turns at 48 and 72-96 hours.
- Criollo: 3–4 days total, with one turn around 48 hours.
The core temperature should reach 45–50°C by the second day. If it’s still below 40°C, your batch may be too small or inadequately insulated.
Step 6: End Fermentation Based on a Cut Test

Don’t rely on the calendar alone. The best way to know when fermentation is complete is to look inside the beans. A cut test reveals the true state of your cocoa.
- How to do a Cut Test: Randomly take 100 beans from various parts of the mass. Cut them in half lengthwise. A successful fermentation will show 80-90% fully brown beans, with very few purple or slaty (gray) ones. The aroma should shift from sharp vinegar to a pleasant, fruity cocoa scent.
Step 7: Dry Beans from Slow to Fast

The drying phase locks in flavor and prevents mold. Start slowly to avoid “case hardening,” where the outside of the bean dries too fast and traps moisture inside. Then, speed up the process to reach the target moisture content.
- Drying Methods: Use raised beds, drying mats, or indirect mechanical dryers.
- First 2 days: Keep the bean layer thicker (3-4 cm) and provide some shade during the hottest part of the day.
- After day 2: Spread the beans into a thinner layer (2-3 cm) and increase airflow.
- Target Moisture: Aim for 6–8%. You can confirm this with a moisture meter. Field signs include a rattling sound when shaken and a clean snap when you break a bean.
Step 8: Sort, Grade, and Bag Cleanly
Sorting removes defective beans and raises the value of your lot. A final quality check ensures you get the best possible price.
- Sorting Checklist: Remove any moldy, slaty, flat, or insect-damaged beans. Sieve out any foreign materials like stones or shell fragments.
- Bagging: Use only clean, dry jute or sisal sacks. Never use bags that previously held chemicals. Label each bag with the farm name, lot number, dates, and weight.
Step 9: Store in a Cool, Dry, and Odor-Free Place
Proper storage protects your hard work. High humidity and warm air are invitations for mold and insects, while strong odors can easily taint your cocoa.
- Storage Tips: Store bags on pallets, keeping them off the floor and away from walls. The ideal storage room is below 25°C with less than 65% relative humidity. Keep cocoa away from fuel, smoke, spices, and other strong-smelling substances.
Common Mistakes to Avoid
- Mixing Ripe and Unripe Pods: Fix this by training pickers to identify ripeness by sight and sound.
- Fermenting in a Shallow Heap: Always aim for a depth of at least 50 cm to retain heat.
- Skipping Turns: Set reminders and stick to a turning schedule appropriate for your bean type.
- Ending Fermentation by the Calendar: Always use a cut test. Trust the color and aroma of your beans, not just the clock.
- Drying Over Smoke: Use solar drying or indirect dryers to avoid a smoky taint.
- Bagging Damp Beans: Confirm moisture is between 6–8% with a meter before bagging. When in doubt, dry one more day.
By focusing on these key steps, you can take control of your cocoa’s quality, creating beans with the rich, complex flavors that buyers and chocolate makers value most.
If you would like to know where the cacos come from, their origins, click here.